Gardening Guides: Difference between revisions
Jump to navigation
Jump to search
Florez4747 (talk | contribs) No edit summary |
Florez4747 (talk | contribs) No edit summary |
||
| Line 2: | Line 2: | ||
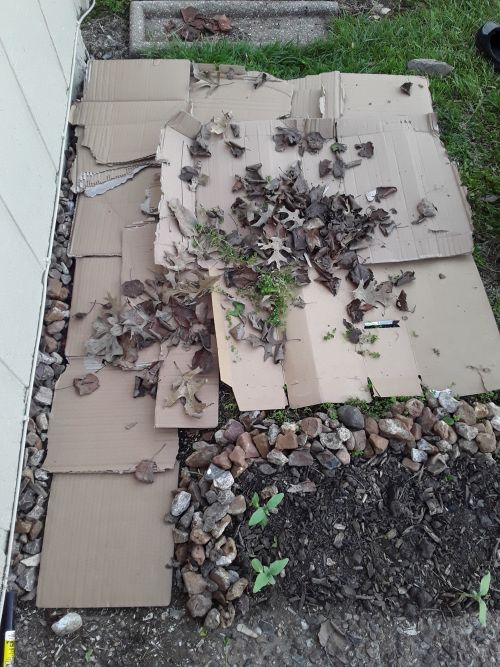
[[File:GardenBed2.jpg|500px|thumb|center|'''Step 2:''' For this step you will need cardboard- the amount will depend on the size of the bed you are trying to make. I just simply rip the pieces up and put the cardboard down like a puzzle piece until the area is covered with the cardboard. If the ground is uneven in the area you’ve chosen, no worries, you can use more cardboard on those areas to build the height of the section to match the surrounding area. The next step will allow you to build up the height of your bed as well. As you can see in the photo, we began to place leaves and grass clippings on top of the cardboard.]] | [[File:GardenBed2.jpg|500px|thumb|center|'''Step 2:''' For this step you will need cardboard- the amount will depend on the size of the bed you are trying to make. I just simply rip the pieces up and put the cardboard down like a puzzle piece until the area is covered with the cardboard. If the ground is uneven in the area you’ve chosen, no worries, you can use more cardboard on those areas to build the height of the section to match the surrounding area. The next step will allow you to build up the height of your bed as well. As you can see in the photo, we began to place leaves and grass clippings on top of the cardboard.]] | ||
[[File:GardenBed3.jpg|500px|thumb|center|'''Step 3:''' This step and the following step are basically the same, but I would recommend getting your soil that you’re going to use gathered and positioned next to you, so you can begin piling dirt as soon as you finish creating your garden bed foundation.]] | |||
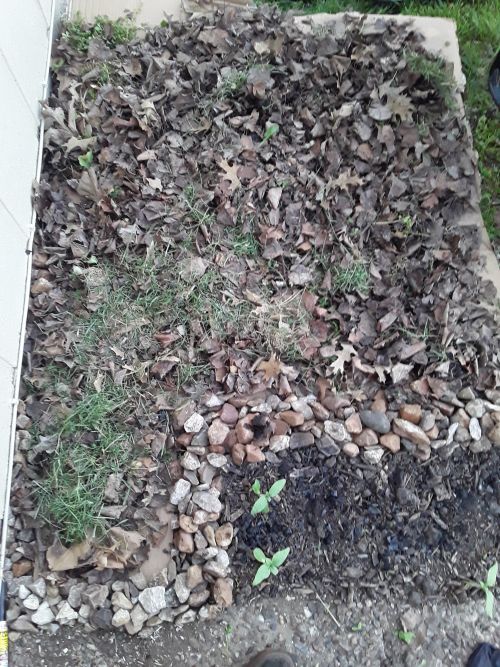
[[File:GardenBed4.jpg|500px|thumb|center|'''Step 4:''' This step is to help build the soil up, while also leveling out the surface area, and to provide nutrients to the garden bed, as the organic matter decays and turns into soil.<br><br> | |||
We heavily covered our cardboard with lots of leaves (the leaves were at varying stages of decomposition,) grass clippings, and wood ash. For the wood ash I took burnt charred logs from my fire pit and crumbled them up in my hands almost into a powder. The wood ash will provide nutrients while also acting as natural insecticide and pesticide.<br><br> | |||
It’s okay to put larger chunks of wood ash in the pile also, as they will decay and will hold nutrients - slowly releasing nutrients over time during the decay process.]] | |||
Revision as of 21:43, 31 January 2023

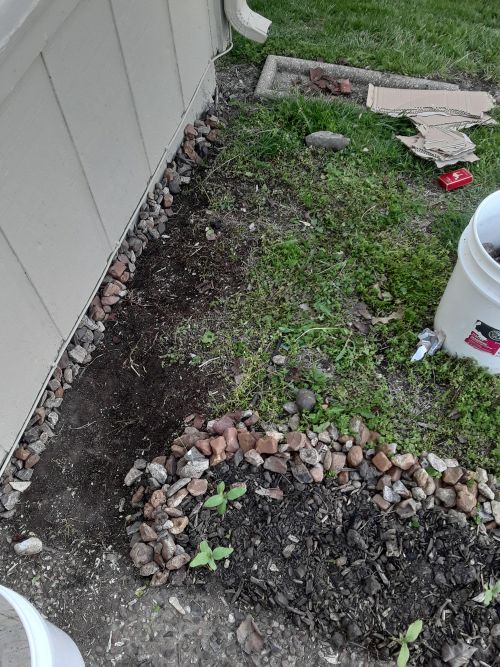
Step 1: Clear the area you plant to use out- don’t worry about pulling up grass or any types of small plants growing. You can begin constructing your barrier at this stage- you can see the rock barricade against the house that we have placed ahead of time, and the other barricade that was already in place at the bottom of the photo. We will use these rock barriers to keep the dirt in later.

Step 2: For this step you will need cardboard- the amount will depend on the size of the bed you are trying to make. I just simply rip the pieces up and put the cardboard down like a puzzle piece until the area is covered with the cardboard. If the ground is uneven in the area you’ve chosen, no worries, you can use more cardboard on those areas to build the height of the section to match the surrounding area. The next step will allow you to build up the height of your bed as well. As you can see in the photo, we began to place leaves and grass clippings on top of the cardboard.


Step 4: This step is to help build the soil up, while also leveling out the surface area, and to provide nutrients to the garden bed, as the organic matter decays and turns into soil.
We heavily covered our cardboard with lots of leaves (the leaves were at varying stages of decomposition,) grass clippings, and wood ash. For the wood ash I took burnt charred logs from my fire pit and crumbled them up in my hands almost into a powder. The wood ash will provide nutrients while also acting as natural insecticide and pesticide.
It’s okay to put larger chunks of wood ash in the pile also, as they will decay and will hold nutrients - slowly releasing nutrients over time during the decay process.